You can now target your visitors using their name, demographics, and more with Smart tags.
At OptiMonk, we stay at the forefront of digital marketing, delivering new ways to customize your messages with each new release. This time, we’ve changed the game completely. Smart tags offer an entirely new level of customization for your onsite retargeting campaigns. You can now create fully personalized messages that target your individual visitors.
Smart tags insert text based on any variable you choose. This allows you to craft your messages for the very specific needs of each visitor… automatically!
Imagine if you could thank every person that visited your ecommerce site by name… or provide a special offer based on the products they’ve viewed… all without lifting a finger. Well, that’s exactly what Smart tags can do. Let’s see how it works.
What are Smart tags?
Our new Smart tags feature lets you alter the text in your popup based on any variable you wish. This way, you can display highly targeted messages to individual visitors using only one popup.
You don’t have to create different popups for all the different groups in your audience. Smart tags give you the power to display fully-personalized information in your popup that engages your visitors and encourages them to buy or subscribe based on their specific needs.
Let’s look at some of the ways you can use Smart tags to deliver personal messages:
- Target visitors based on their location, gender, age, etc. by using dynamically altered text
- For ecommerce sites, you can dynamically change your incentive (i.e. the percentage of a discount) depending on the product or category page where the visitor is browsing
- Create a personalized Thank You page after your visitors convert or signup in the first popup
Using Smart tags
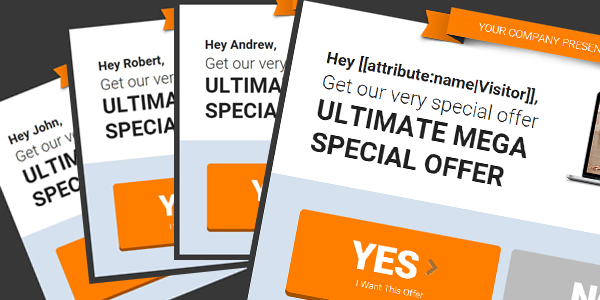
Let’s take a look at a simple example that demonstrates clearly how to use Smart tags. Let’s see how you can display the name of your visitor on your popups. For this purpose, you need to insert the following variable where your visitor’s name should appear:
[[attribute:name|Visitor]]
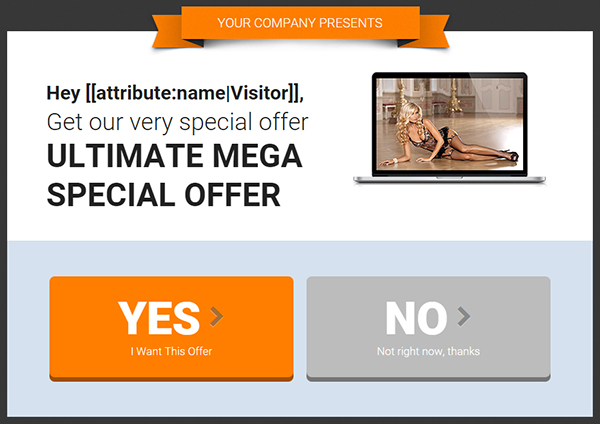
When your popup appears, the name attribute will be replaced by the name variable.

To use Smart tags, you’ll need to configure your custom variables. Custom variables can be used to segment your visitors based on any criteria you want. You can find the settings for custom variables in the Campaign Settings menu:

To display the correct information in your popup, you’ll need to define the custom variable for OptiMonk. You do this by adding some JavaScript code into the source code of your website. Let’s take a look at the following example that shows the JavaScript code to define a variable:
<script type="text/javascript">
  var OptiMonkOnReady = function () {
   var adapter = OptiMonk.Visitor.createAdapter();
   adapter.attr('registered', 'yes');
   adapter.attr('name', ’Visitor’);
  };
</script>
When the JavaScript code above runs in a visitor’s browser, the value will be saved in the browser assigned to that visitor. The value will be unchanged until it’s redefined by another action.
Please note that the using custom variables require some knowledge of coding. Your developer can help you create the necessary variables so your campaigns show the right messages to each user.
(Note: Have you heard of OptiMonk? It’s a powerful onsite messaging solution that helps you convert up to 15% of abandoning visitors to sales and leads. Give it a try – click here to create a free OptiMonk account now.)