Table of Contents
The right picture can make or break a sale. As an ecommerce seller, it’s essential to know how to take high-quality product photos that accurately represent your products—and your brand.
Customers always want to see products that can meet their needs, no matter how far along the sales journey they are. That’s why product photos are an essential ingredient when it comes to marketing your business and boosting sales.
Today’s consumers are used to seeing beautiful, high-quality images. If you’re using photos that are poorly lit, blurry, or low quality, people will automatically assume your products are also of low quality.
In this article, we’ll share 8 tips to help you take professional product photos. Ready to improve your product photography skills and increase your sales?
Let’s get right into it!
How to take product photos
Taking great photos is an art and a science. Luckily, it can be learned! Here are some of the top product photography tips you can use to make your own product photos look like they were taken by a seasoned pro.
1. Use a tripod
While this might be optional for some photos, we highly recommend using a tripod when taking pictures of products. This will help you keep the camera still and avoid any blurriness in the image.
But how to unblur an image is no longer an issue as there are many ways to do it.
A tripod ensures that your product photos are clear and sharp, two key factors in presenting your products in the best light possible.
So, when is a tripod essential? If you’re taking photos of small, delicate products, you definitely want to use a tripod to avoid any shaking or movement.
A tripod is also helpful when taking close-up photos of products, helping you get a crystal clear shot with no risk of your hand getting in the way.
2. Use a plain background
A plain background helps your product stand out. Usually, a white or light-colored background is best as it makes the product pop and helps avoid any distractions in the background.
If you’re selling on a marketplace like Amazon, using a white background is required for many product categories.
Even if you’re not selling on Amazon, it’s a good idea to use a white background for product photos to keep the focus on the product and make the image look more professional.
If your product photos don’t have a white background, you can use a free image background remover to remove that background and easily add a white background.
Depending on the types of product photography you’re doing, you may want to consider using a seamless background. Basically, this is a piece of fabric that can be hung up and used as a background to achieve a clean, consistent look for your product photos.
This is especially helpful if you plan on taking multiple pictures of the same product from different angles, and makes product photo retouching a lot easier.
3. Use natural light
In general, natural light will give your photos a softer, warmer look. It’s also easier to control than artificial light, which can be challenging to get right.
Check out this hearing aid care product page, which focuses on product maintenance. Using natural light when taking the photos for this product page helps create a softer, more inviting feel.
This is a strategic move, since the product (and its upkeep) could otherwise be seen as intrusive or inconvenient.

When using natural light, try to take photos near a window with diffused light. This will help prevent any harsh shadows in your image. Place the item you’re photographing perpendicular to the window so that the light is evenly distributed.
When it comes to ecommerce advertising, you want your prospect to imagine themselves using your product. That’s why natural light photos are best, as they help create a more lifelike, relatable image.
4. Edit your photos correctly
Even if you take the “perfect” photo, there’s a good chance it will still need some minor editing before it’s ready to be used.
This is where photo editing software comes in. This type of software can help you make small tweaks to your photos, helping them look their best.
There are many different photo editing software programs out there, but we recommend using Adobe Photoshop. It’s a reasonably user-friendly program, and it has all the features you’ll need to edit your product photos.
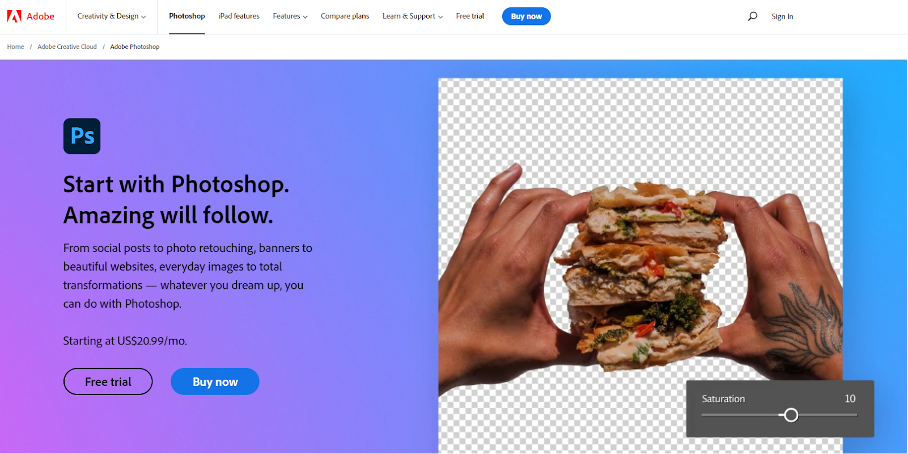
VEED’s background remover comes in handy in removing distracting backgrounds or blurring them to highlight your product even further.
If you’re editing on your phone, software such as Snapseed, VSCO, and Lightroom CC can also help you make minor edits to your photos. Picsart is also a superb tool for turning photos into cartoons and adding fun effects.
Once you’ve edited your photo, it’s essential to save it in the correct file format.
For product photos, we recommend saving them as JPEGs. This is the most commonly used file format for product images, and it will help ensure that your photo looks good on all devices, while still being small enough to load quickly.
5. Bounce your light to get the right shadows
With shadows, less is usually more. Harsh shadows can make your product photos look less professional, so avoiding them is essential.
If you must use artificial lighting, bouncing your light is a simple way to reduce harsh shadows. By bouncing your light, you’re diffusing and softening the light, giving your photos a more natural look.
To bounce your light, there are a few pieces of equipment you might want to use:
- A reflector: This is a white or silver piece of fabric that you can hold up to reflect light onto your subject. Reflectors are especially helpful when taking photos outdoors.
- A softbox: This is a type of artificial light that diffuses the light, making it softer. Softboxes are often used in studios, and they can be a bit pricey. If you’re just starting out, try searching online for cheaper options.
- A diffuser: This is a piece of translucent fabric that you can place over your light source to diffuse the light and reduce shadows.
Bouncing your light is a simple way to get softer, more natural-looking shadows in your product photos. Using a reflector, softbox, or diffuser can help create the perfect lighting for your product photos.
6. Use props to style your photos
Props are a great way to add style and personality to your product photos. There are endless possibilities when it comes to props, but some common ones include:
- Flowers
- Plants
- Greenery
- Ribbons
- Fabric
- Paper
These are just a few examples, but the sky’s the limit when styling your product photos with props. Using props, you can add some extra flair to your pictures and make them much more interesting.
Plus, if you’re able to create a recognizable “look” for your brand using props, you’ll be well on your way to standing out from the masses.
Props are also helpful in other situations. For instance, imagine that you want to take photos of a service that’s tough to capture, since there’s no physical product.
Props for this situation might include things like:
- a laptop or computer
- a cup of coffee
- a notebook
- a pencil
Using these simple props, you can help give your photos some context and make them more relatable for your prospects.
If you can get someone who evokes the target persona for your service to pose with the props in the photo, even better!
7. Use portrait mode when needed
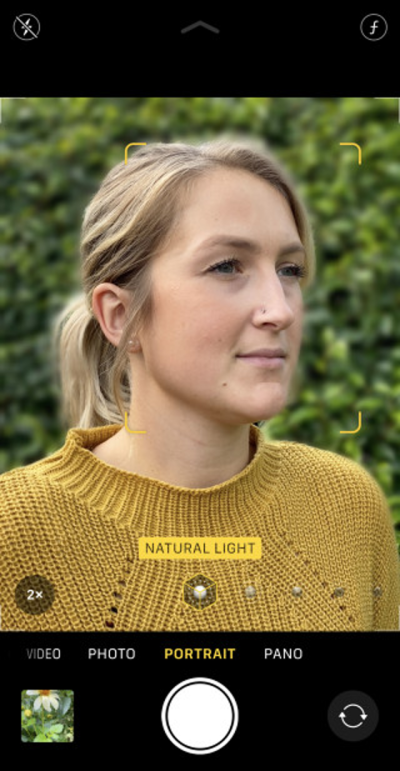
The portrait mode on your camera app is a great way to take a pro headshot and also products that are hard to capture with a traditional camera.
This mode is especially useful for taking close-up photos of small product details, like intricate beadwork on a piece of jewelry.
Open your camera app and swipe to the portrait mode option. Then, just point your camera at your subject and tap the shutter button!
8. Experiment and have fun
Finally, don’t forget to experiment and have fun with your product photos!
There are no hard and fast rules for taking great product photos, so, play around with different lighting, angles, props, and more until you find what works best for you and your products.
By experimenting, you might surprise yourself with the results.
Plus, trying different things is a great way to effectively A/B test which pictures perform better by analyzing the engagement rates you get. Over time, it will also allow you to shoot increasingly on-brand product photos.
Types of product photography
Different types of product photography serve different purposes, each highlighting unique aspects of your product.
Let’s dive into the various types you should consider for your next photo shoot:
1. Individual shots
These are your classic product photographs. They focus on a single item, often with a clean, white background.
This type is perfect for the listings of an ecommerce store where the product needs to stand out without distractions. They help customers see the product clearly and make purchasing decisions.
Here’s a perfect example of an individual product shot from BÉIS Travel:

2. Group shots
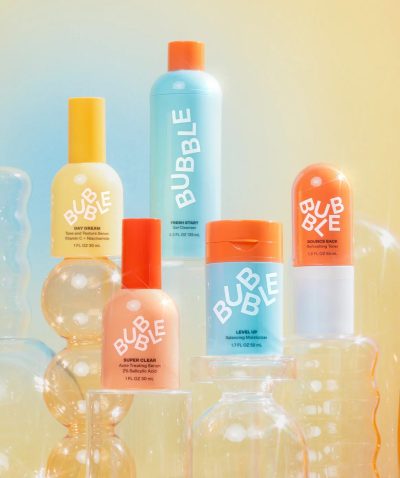
Group shots feature multiple products together. These are great for showcasing collections, bundles, or variety packs.
They help customers visualize product assortments and see how items look together, encouraging larger purchases.
Here’s an example from Bubble Skincare for showing bundles on group ecommerce photos:
3. Lifestyle shots
Lifestyle photos show your product in use, often with models or in a natural setting. These product images tell a story and help customers imagine the product in their own lives.
They are perfect for social media and marketing materials, creating an emotional connection with your audience.
Check out how AG1 uses lifestyle photos on their website:

4. Scale shots
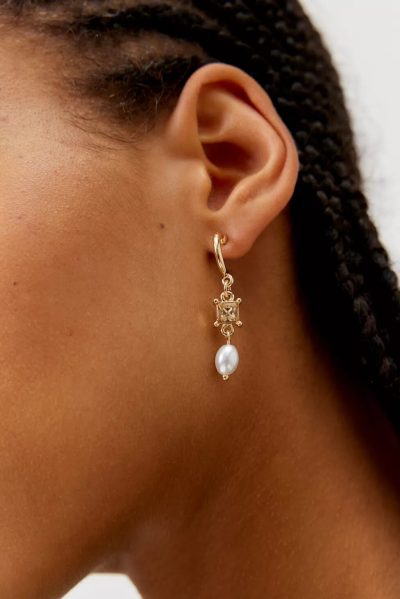
Ever ordered something online and been surprised by its size? Scale shots solve this by showing the product next to a common object, like a coin or a hand.
This gives customers a clear idea of the product’s dimensions, reducing returns and increasing satisfaction.
Urban Outfitters uses a scale shot for this earring:
5. Detailed shots
Sometimes, the magic is in the details. Detailed shots zoom in on specific features or textures of the product.
Whether it’s the stitching on a handbag or the grain of a wooden table, these photos highlight quality and craftsmanship, appealing to discerning buyers.
This SKIMS product image is a perfect example of a detailed shot:

6. Packaging shots
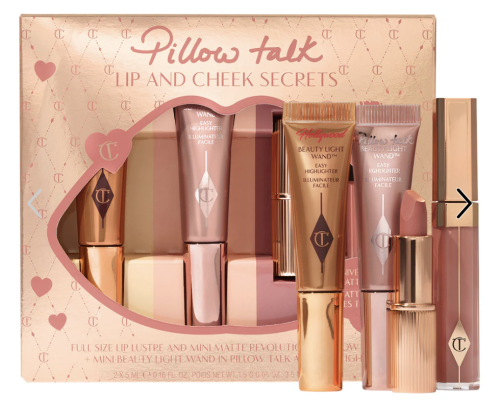
Don’t overlook the packaging! Packaging shots show how the product looks when it arrives.
This is especially important for gift items or subscription boxes. Good packaging can enhance the unboxing experience, making customers feel excited and valued.
Take a look at this successful product photography example with packaging from Sephora:
Smartphone vs. professional camera
Want to get professional product photography but don’t have the budget for a professional photographer? No problem!
While a professional photographer will undoubtedly produce the best results, you can still get great product photos with a smartphone camera.
Your goal is high-quality images, whether you use a smartphone or a professional camera. Getting the right camera angles and close-up shots can be accomplished with a smartphone camera and a few post-edits. And you may also visit the Backlightblog website, which offers valuable pointers to help you master photography on a smartphone.
Deciding on the camera settings to use will depend on whether you’re shooting food photography, product photography, or still life photography. For example, if you’re shooting food photos, the recommendation is to use an ISO of 400 or less to get the best results.
That said, you typically won’t even have to go into manual mode, as most smartphone cameras will automatically default to the best settings before taking the picture.
Lighting techniques for product photography
Good lighting can make or break your product images. Here’s how to master both natural or artificial light to make your products shine.
1. Natural lighting
Natural lighting is ideal for beginners. It’s free, easy to find, and produces soft, flattering light.
Set up near a large window with indirect sunlight to avoid harsh shadows. If the light is too strong, diffuse it with a white curtain or a sheet of paper.
Morning and late afternoon light are often the best times for shooting, giving a warm, even glow to your photos.
2. Artificial lighting
Artificial lighting gives you control over your lighting setup, making it perfect for consistent results.
Here are some tips to get it right:
- Softboxes and diffusers: Use softboxes to mimic natural light and soften shadows. Place them at a 45-degree angle to your product for balanced lighting. If you don’t have a softbox, you can use a white umbrella or even a DIY diffuser like a shower curtain.
- Reflectors: Bouncing light back onto your product can reduce shadows and highlight details. You can buy professional reflectors or use everyday items like white poster boards or aluminum foil.
- Light tent: For small products, light tents are fantastic. They create an even light all around your product, minimizing shadows and reflections. You can make a DIY light tent using a cardboard box, white fabric, and some LED lights.
Editing and optimization tips
Editing and optimizing your product photography is the final step to make them pop. Here’s how to do it right.
1. Post-production editing
Editing can transform your photos from good to great. Here are some essential photo editing software you can use:
- Adobe Photoshop: Industry standard for a reason, you can create incredible photos with it. Use it for advanced retouching, like removing blemishes or enhancing colors. Play with levels, curves, and saturation to make your product stand out.
- Lightroom: Perfect for batch editing photos. Adjust exposure, contrast, and white balance with ease. Sync settings across multiple images for a consistent look.
- Canva: Great for quick edits and adding text or graphics. It’s user-friendly and perfect for beginners.
2. Optimization for web
Fast-loading images improve user experience and SEO. Here’s how to optimize your photos:
- Resize all your images: Large images slow down your site. Use tools like Photoshop or online compressors to resize without losing quality. Aim for around 1200 pixels on the longest side.
- Compress files: Use JPEG for photos and PNG for graphics with transparency. Tools like TinyPNG or JPEGmini can significantly reduce file size.
- Alt text: Don’t forget to add descriptive alt text to your images. It’s good for SEO and accessibility.
Conclusion
Filling your online store with high-quality photos that showcase your products in the best light can be an absolute game-changer when it comes to driving conversions and increasing sales.
As we’ve seen, the right product shots can be the final push that customers need to hit “add to cart.”
Remember that you don’t need to go to a photo studio to get great product photos. Using your Android or iPhone camera (and following the tips above) you can take amazing product photos that will help boost your sales.
Don’t forget to edit your photos with a product photo editing app to take your images to the next level!
Having beautiful, on-brand product shots that look professional will help you build trust with your customers and ultimately boost your bottom line.
About the author
Hanson Cheng is the founder of Freedom to Ascend. He empowers online entrepreneurs and business owners to 10x their business and become financially independent. You can connect with him here.
Migration has never been easier
We made switching a no-brainer with our free, white-glove onboarding service so you can get started in the blink of an eye.

What should you do next?
Thanks for reading till the end. Here are 4 ways we can help you grow your business:
Boost conversions with proven use cases
Explore our Use Case Library, filled with actionable personalization examples and step-by-step guides to unlock your website's full potential. Check out Use Case Library
Create a free OptiMonk account
Create a free OptiMonk account and easily get started with popups and conversion rate optimization. Get OptiMonk free
Get advice from a CRO expert
Schedule a personalized discovery call with one of our experts to explore how OptiMonk can help you grow your business. Book a demo
Join our weekly newsletter
Real CRO insights & marketing tips. No fluff. Straight to your inbox. Subscribe now
- Posted in
- Ecommerce
Partner with us
- © OptiMonk. All rights reserved!
- Terms of Use
- Privacy Policy
- Cookie Policy
Product updates: January Release 2025


