- Blog
- A Complete Guide to Popup Triggers & A/B Testing Them
A Complete Guide to Popup Triggers & A/B Testing Them
Table of Contents
Popups can be incredibly effective for engaging visitors and boosting conversions on your website, but their success hinges on timing.
A popup that appears at the wrong moment can disrupt the user experience and drive visitors away.
On the other hand, a well-timed popup can work wonders, enhancing engagement and increasing conversion rates.
In this guide, we’ll break down:
- what popup triggers are
- the different types of popup triggers
- why A/B testing popup triggers is essential
- how to set it all up using OptiMonk
Let’s dive in!
What is a popup trigger?
A popup trigger is the condition or action that causes your popup to appear on a visitor’s screen.
Think of it as the “when” and “why” behind the appearance of your popup. Without a trigger, your popup is just sitting idle, waiting for the right moment.
The right popup trigger ensures that your message appears at the right time when the visitor is most likely to engage with it.
Different types of popup triggers
There’s no one-size-fits-all approach when it comes to popup triggers. The ideal trigger depends on your website’s content, your audience, and your goals.
Below, we explore the most common types of popup triggers and when to use them.
1. On exit intent
This trigger detects when a visitor is about to leave your site. Often, this is when the mouse moves toward the browser’s close button or another tab.
Exit-intent popups are perfect for recapturing the attention of visitors who are about to abandon your site, offering them a discount or lead magnet in exchange for their attention.
For example, when a visitor moves their mouse to leave the site, an exit-intent popup could offer them a 10% discount to encourage them to stick around and make a purchase.
2. After X seconds
A time-based trigger shows the popup after the visitor spends a set amount of time on the page. While this is an easy-to-implement trigger, it requires careful testing to avoid being too aggressive.
A popup that appears too soon can feel intrusive, while one that takes too long may miss the opportunity.
3. On clicking a specific area
With this trigger, the popup appears only when a visitor clicks a certain button, link, or image.
This creates a more personalized experience, since the popup feels like a natural extension of their action. It’s great for content upgrades, sign-ups, or any other call-to-action tied to a specific click.
For example, if you’re running a blog and want visitors to sign up for a newsletter, a popup triggered by clicking a “Subscribe Now” button feels like a natural next step.
It’s not intrusive because the visitor actively chose to engage.
4. After X% scrolling
This trigger shows your popup after the visitor scrolls down a certain percentage of the page. It works well for blog posts, long-form content, or product pages where visitors are already invested in what they’re reading or viewing.
By waiting for them to engage with your content, scroll triggers can help avoid interrupting the browsing experience.
5. After X seconds of inactivity
If a visitor stops engaging with your site (no clicks, no scrolling), this trigger can activate the popup to recapture their attention and boost user engagement.
It’s a smart way to reach out to visitors who may be distracted or have lost interest but are still on your page.
6. After a JavaScript event
For advanced setups, custom events like adding an item to the cart, watching a video, or completing a quiz can trigger a popup.
This is one of the most targeted ways to show popups, as it’s based on specific visitor behavior.
It allows for highly personalized messaging tailored to the user’s actions on your site, helping to capture visitors’ attention at precisely the right moment.
Why should you A/B test popup triggers?
Even the best-designed popup can fall flat if the trigger timing doesn’t align with your visitors’ behaviors. A/B testing allows you to experiment with different popup triggers to see which one yields the highest conversion rates.
Here’s why A/B testing your popup triggers is a must:
- User behavior is unpredictable: What works for one website might not work for another. A/B testing helps you uncover the triggers that resonate with your unique audience.
- Timing matters: A popup that appears after five seconds might feel intrusive to some, but after 20 seconds, it could feel perfectly timed. Testing helps you fine-tune this balance.
- Small tweaks = big impact: Even minor changes, like adjusting the scroll percentage or inactivity time, can significantly affect conversion rates. A/B testing lets you determine the most effective settings.
By A/B testing, you remove the guesswork and instead use real visitor data to make informed decisions. This ensures that your popups not only appear at the right time but also generate the best results.
Examples of popup trigger tests
Let’s look at some examples of popup trigger tests, along with a real-world case from EDGE® and how they achieved success.
1. 3 sec vs 15 sec
Test whether showing a welcome discount right after visitors land on the page (3 seconds) works well, or if waiting a bit longer (15 seconds) and allowing visitors to settle in before being prompted leads to higher engagement.
Sometimes, an immediate offer can feel intrusive, while giving visitors more time to browse could lead to more meaningful interactions and a higher conversion rate. The right balance can make a big difference in the user experience.
2. 15 sec vs exit-intent
Compare the effectiveness of showing a special offer after 15 seconds of engagement versus triggering a popup when a visitor shows intent to leave the site (exit intent).
The 15-second trigger may capture users who are already engaged, while exit-intent popups target visitors who are likely to abandon the page. Testing both can help you determine whether engaging early or re-engaging before exit leads to more conversions.
3. Exit-intent + 80% scroll vs exit intent only
Offer a lead magnet, such as an eBook, to visitors who are about to exit the site. One variant could trigger when users show exit intent, while the other appears only when users have scrolled down 80% of the page and are about to exit.
The second variant targets more engaged visitors who have shown an interest in your content. This A/B test helps you identify if targeting highly engaged users before they leave provides better results than a broader exit-intent trigger.
4. Click on “Add to Cart” vs scroll 50%
Test showing an upsell or bundle offer right after a visitor adds an item to their cart versus triggering the offer after they’ve scrolled down 50% of the page.
The “Add to Cart” trigger is more direct and specific to users already in the purchase journey, while the scroll-based trigger targets visitors who may not be actively considering a purchase (but could be convinced with a good offer).
This test can reveal which type of user engagement results in more conversions.
5. 60% scroll vs exit intent vs 15 sec inactivity
Test a countdown popup offering free shipping or a discount (e.g., 15% off) triggered by three different visitor behaviors: after scrolling down 60% of the page, when exit intent is detected, and after 15 seconds of inactivity.
Each trigger targets a different type of visitor behavior—those actively engaged, those about to leave, and those who’ve paused.
Running this test can help you identify which audience segment responds best to the offer and increases conversion rates.
See it in action: EDGE®’s popup trigger test
To see the effectiveness of A/B testing in action, let’s explore an example:
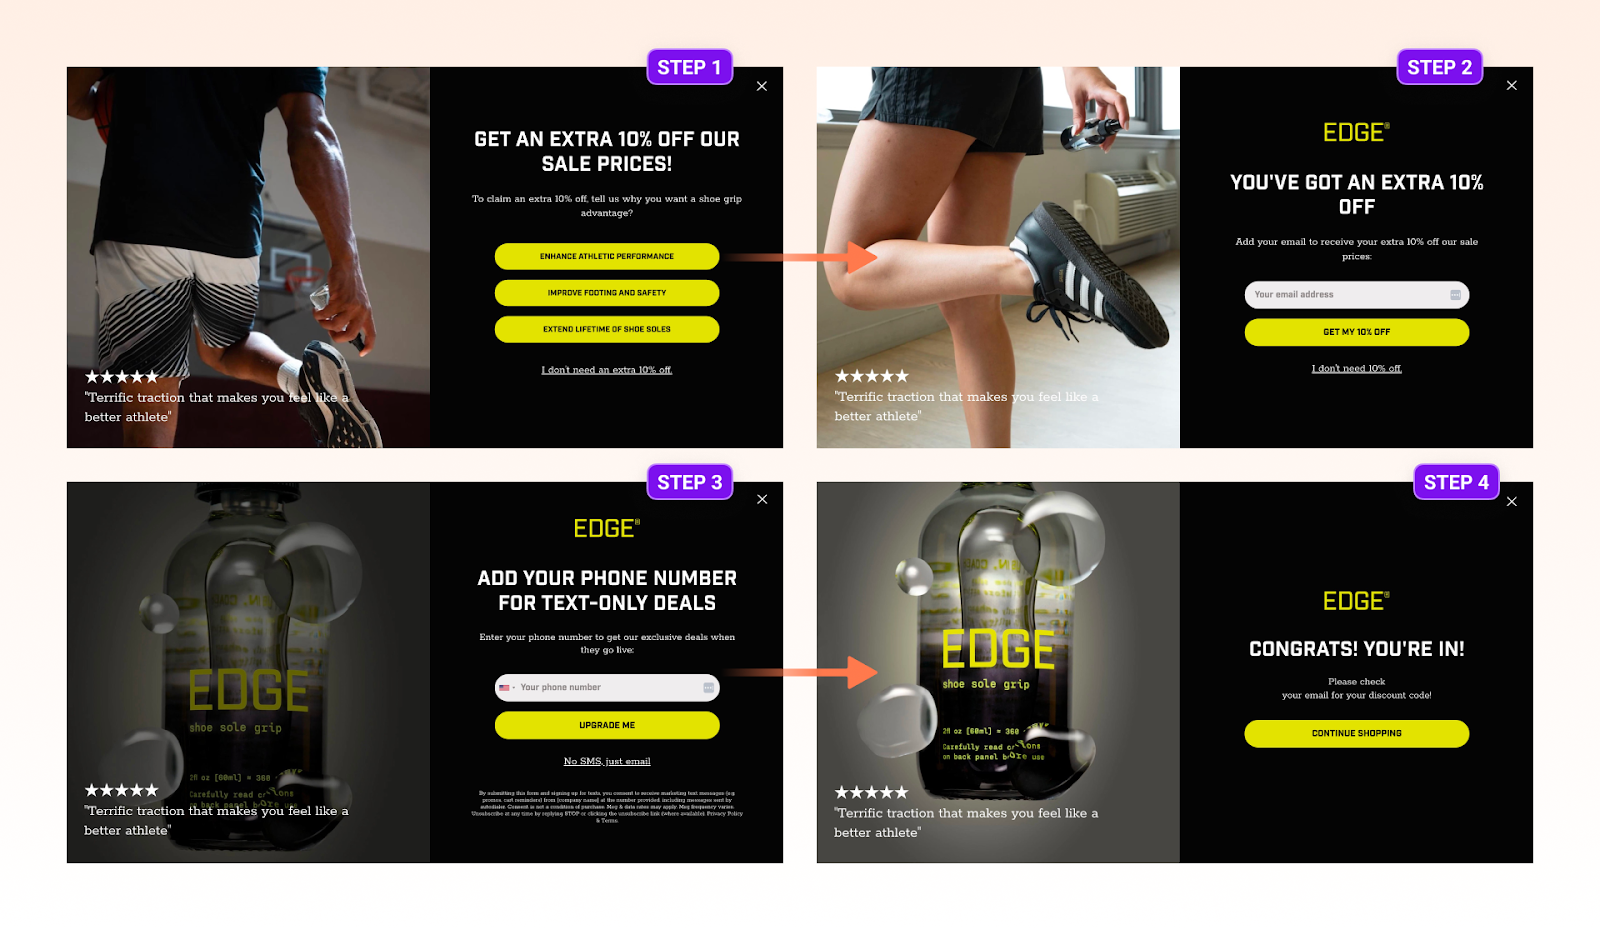
EDGE®, a fitness brand specializing in grip-enhancing spray for shoe soles, wanted to optimize its popup timing strategy. The brand ran an A/B test comparing two popup timing approaches:
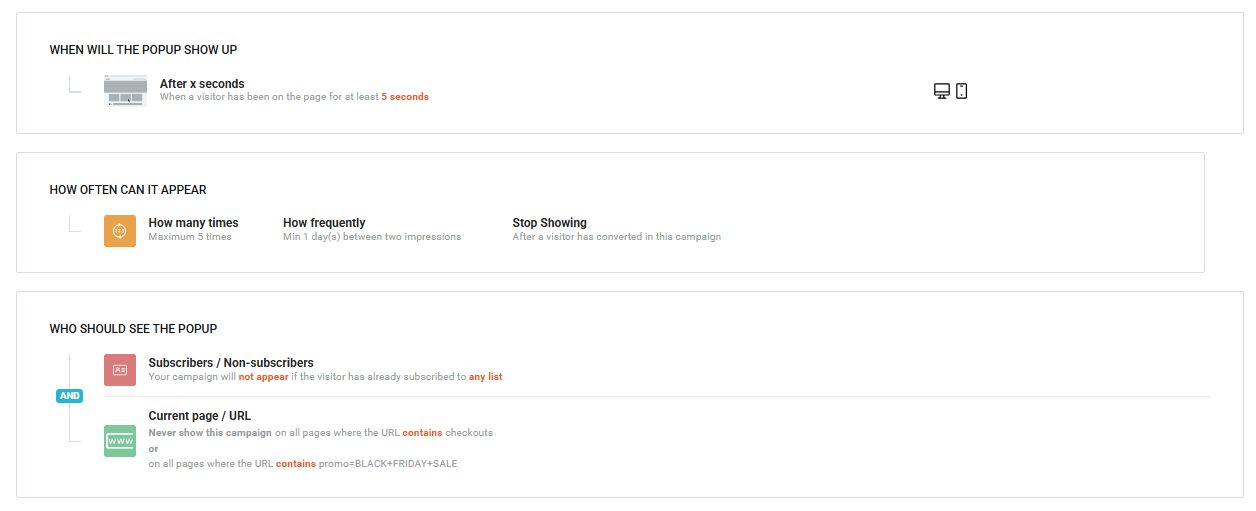
- Welcome popup: Displayed 5 seconds after visitors landed on the site.
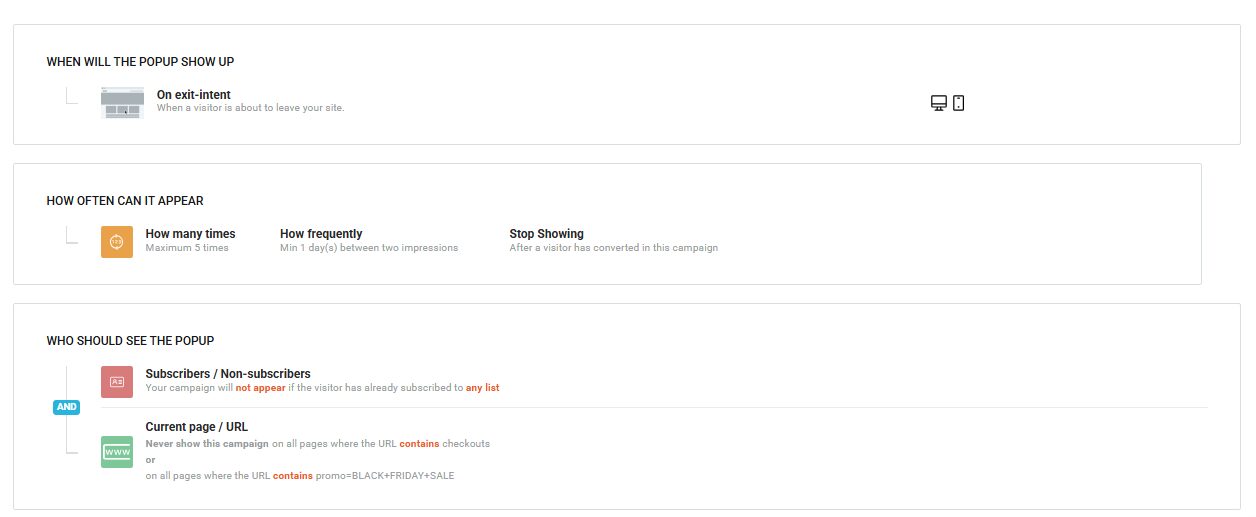
- Exit-intent pop-up: Triggered when visitors showed intent to leave the site.
Both popups had the same design and offered the same incentive: 10% off, with the goal of building the brand’s email and SMS subscriber lists.
The only variable was the timing of the popups.

The exit-intent popup led to a 7.84% increase in revenue compared to the 5-second welcome popup, demonstrating that a well-timed exit-intent popup can significantly boost conversions and generate more leads.
How to A/B test popup triggers with OptiMonk?
Ready to start A/B testing popup triggers on your own site? Here’s how you can get started with OptiMonk—it just takes a few clicks:
Step 0: Sign up for an OptiMonk account
Don’t have an OptiMonk account yet? Now’s the perfect time to create one here.
Step 1: Create your first campaign
(If you already have a welcome popup campaign set up, feel free to move on to the next step.)
Choose from our extended library of 300+ templates and create your welcome popup.
Once you’ve built your popup, choose your trigger. For example, the popup in the example below triggers after 5 seconds.

Step 2: Duplicate your campaign
Once your welcome popup is all set, duplicate it to create a second version.
Keep everything the same, just change the trigger. For example, if the first popup appears after 5 seconds, set the duplicated campaign to be triggered on exit intent.

Step 3: Start a new Multi campaign A/B Test
Now, it’s time to test the two campaigns against each other. Here’s how you do it:
- Select “Optimize a Website” in OptiMonk.
- Click “Multi-Campaign A/B Test” and choose “Get Started.”
- Select your domain.
- Add the two campaigns you created earlier.
- Set the traffic share to 50/50% and activate the test.
Step 4: Measure performance and make data-based decisions
Once you’ve collected enough data (at least 100 total conversions across both variants and the campaign has been running for at least 1-2 weeks), it’s time to analyze the results.
Determine which trigger is performing best and consider stopping the test once you’ve identified the winner.
Then, you can focus on running a more effective campaign!
FAQ
What are the benefits of popup trigger testing?
Testing popup triggers allows you to discover the best timing strategies for your audience, resulting in higher engagement and more conversions. It helps you find the sweet spot where popups are effective without being intrusive.
How do I know which popup trigger is right for my website?
The best popup trigger depends on your goals and your audience’s behavior.
For example, if you want to reduce cart abandonment, an exit-intent popup might be effective.
If you want to engage users who are already interested in your content, a scroll-based trigger could work better. A/B testing is the best way to find the optimal trigger for your site.
How long should I run an A/B test for popup triggers?
Typically, you should run your A/B tests for at least 1-2 weeks to gather enough data and ensure your results are statistically significant.
The duration may vary depending on your site’s traffic, but it’s important to gather at least 100 conversions before drawing conclusions.
How can I use exit intent triggers to reduce cart abandonment effectively?
Exit intent triggers are perfect for preventing cart abandonment. By detecting when a visitor is about to leave the site, you can trigger an exit-intent popup offering a discount, a special offer, or a reminder about items left in the cart.
This strategy can help you re-engage visitors and encourage them to complete their purchase before they leave.
Wrapping up
Popup triggers are a critical element of your website’s conversion strategy.
By choosing the right trigger and A/B testing different options, you can ensure that your popups appear at the perfect moment to engage visitors and drive conversions.
So, whether you’re aiming to reduce cart abandonment, grow your email list, or increase sales, start testing your popup triggers today with OptiMonk to see the impact on your bottom line!
Migration has never been easier
We made switching a no-brainer with our free, white-glove onboarding service so you can get started in the blink of an eye.

What should you do next?
Thanks for reading till the end. Here are 4 ways we can help you grow your business:
Boost conversions with proven use cases
Explore our Use Case Library, filled with actionable personalization examples and step-by-step guides to unlock your website's full potential. Check out Use Case Library
Create a free OptiMonk account
Create a free OptiMonk account and easily get started with popups and conversion rate optimization. Get OptiMonk free
Get advice from a CRO expert
Schedule a personalized discovery call with one of our experts to explore how OptiMonk can help you grow your business. Book a demo
Join our weekly newsletter
Real CRO insights & marketing tips. No fluff. Straight to your inbox. Subscribe now
Barbara Bartucz
- Posted in
- Conversion
Partner with us
- © OptiMonk. All rights reserved!
- Terms of Use
- Privacy Policy
- Cookie Policy


